 There is no doubt in the value of good photography when it comes to marketing property developments and private real estate. Good interior & architectural photography will generate more interest from prospective buyers, show real estate in it’s best light and provide the literal and figurative best angles that marketers need to quickly sell the property for the highest achievable price.
Property developments that I’ve personally shot, have sold out purely based on the sales brochure. But shooting a show home to achieve such impressive sales results can present certain issues to the photographer, that we must find solutions to. Some of these solutions are resolved ‘in camera’ on the shoot day. Other photographic issues are unresolvable while at the property being shot, though can be fixed in Photoshop. This, is the art of image retouching.
A perfect example of this was a shoot that I was recently asked to do by my client, ABC Construction. This was a photo shoot that required a good deal of practical solutions whilst shooting both the interiors photography and the architectural/exterior photography. With an incredible product in the form of a 2-storey steel kit customisable townhouse, a show home was constructed in ABC’s factory car park for visiting property investors to inspect, but a car park is not what remote investors want to see when browsing a sales brochure. They want to see a finished home ‘in-situ’, to demonstrate both a track record of project completion and a fully landscaped ‘home’ that they can sell or call their own.
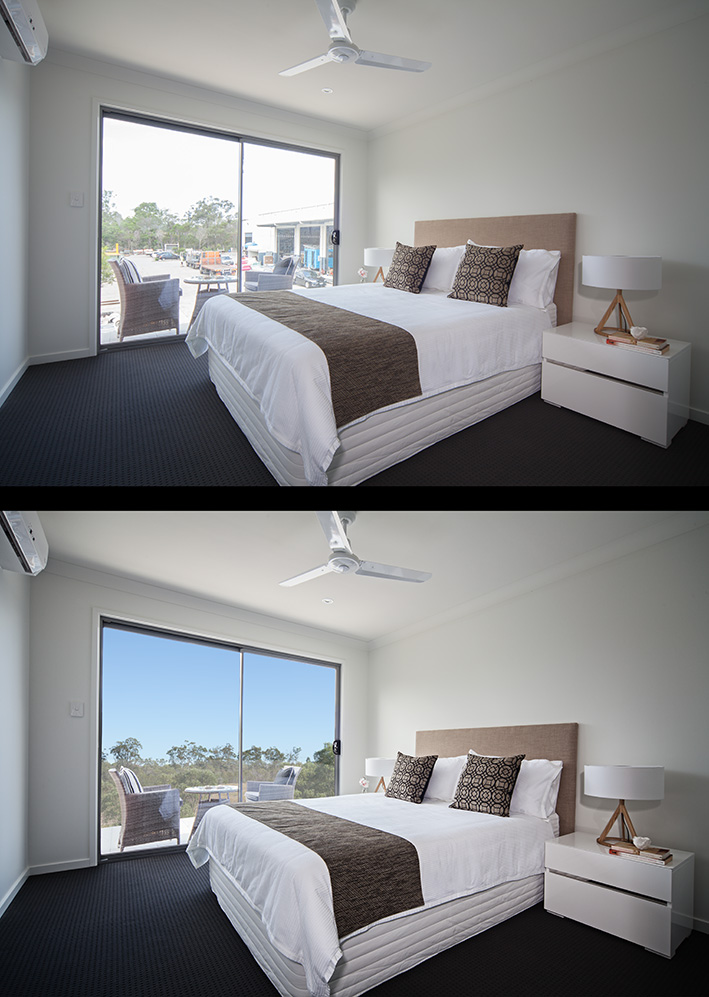
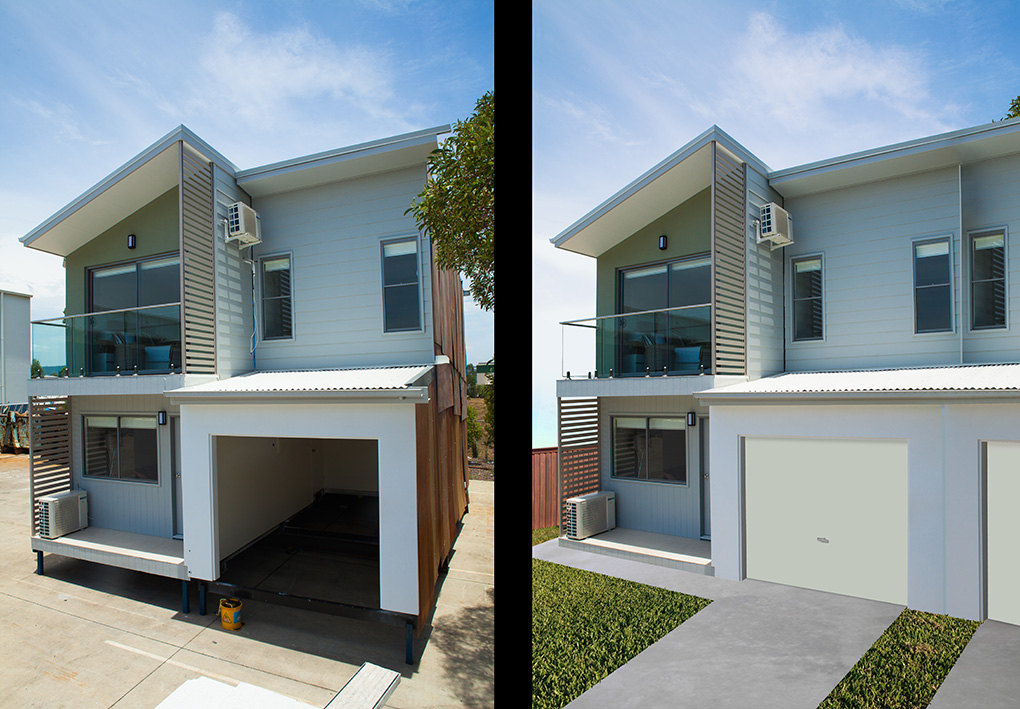
I’ve included a few samples of the ‘before’ photo that I shot for ABC and the ‘after’ image which I retouched for their sales brochure.
There are a range of tricks that a good photo retoucher has up their sleeve, but some of the most common and effective image retouching technique tips for real estate/property photography are:
1. Perspective / vertical correction:
Ensure that your vertical lines are vertical. Without this, walls can look unstable and it’s more obvious which rooms have been shot with a wide angle lens to make the property seem more spacious.
2. HDR adjustment:
To create punchier, high contrast images while maintaining BOTH highlights and lowlights, ask your image retoucher to run a HDR treatment on your images. This can be particularly effective for photos that have for instance, a bright window at one end of the room and a darker corner at the other end.
3. Tone correction:
Ensure colour accuracy by asking your photographer to shoot with a colour card in the test shot. This will allow them to balance any varying light types (eg: when external dusk light and interior lights appear in the same photo).
4. Window retouching:
This creates or corrects blown-out highlights, or can create a window view. It’s important that views being dropped into windows don’t look too contrasty, or they’ll look fake. To avoid this, generously brighten the window view as it would appear to the human eye.
5. Sky retouching:
If you need to replace or enhance the sky in an exterior architecture photo, it’s important to not push this too far. For instance, a property shot on a very cloudy day would ideally not have a full sun sky dropped in, as the light won’t look ‘rightly matched’, even to the eye of an amateur observer. If the sun can be seen in the sky, ensure that it’s on the side that makes the ‘shadow throw’ make sense!
6. Image compositing:
Similarly to the above, it’s vital that the light is matched for any sourced images. Shadows must fall in the same direction and with realistic opacity. Perspectives must match and overlapping objects must blend and obscure background objects seamlessly.
7. Image clean-up:
Often photographer’s are asked to shoot property interiors that are incomplete or haven’t been ‘snagged’ by the builder yet. Removing wall scuffs, cabling hanging from missing light fixtures and unplastered skirting and plaster are common image issues for retouching and vital to allow budget for if the property is to be photographed less than 100% complete.
If you are a property developer or require real estate to be photographed and/or professionally retouched, please do get in touch. I am based in the Gold Coast and Brisbane region of Australia, though have been contracted to shoot properties all over the world by both property developers and design agencies. Some of my interiors and architectural work may be viewed here.